Three-Way Heel Reaches: Hold, Reach, Then React
Video Coaching Lesson 9 · Philipp Halfmann, M.S. Exercise & Sports Science
Learn the three heel-reach progressions: five-second controlled endpoints, reaches without the prescribed hold, and responses to unpredictable target calls. Watch the complete original directional movement reference.
Open The Lesson Video Directly
Browse All Video Coaching Lessons · Explore The Second Edition
Lesson Transcript
Three Levels, One Supporting Foot
The three-way heel reach progresses through timing and target selection. Level one holds each controlled endpoint for five seconds. Level two removes that prescribed hold. Level three introduces unpredictable target calls. Across all three, the same free heel reaches toward the targets while the other foot provides support. The progression is not simply to reach farther or move faster. First establish which condition you want the athlete to perform.
Set The Targets And Support
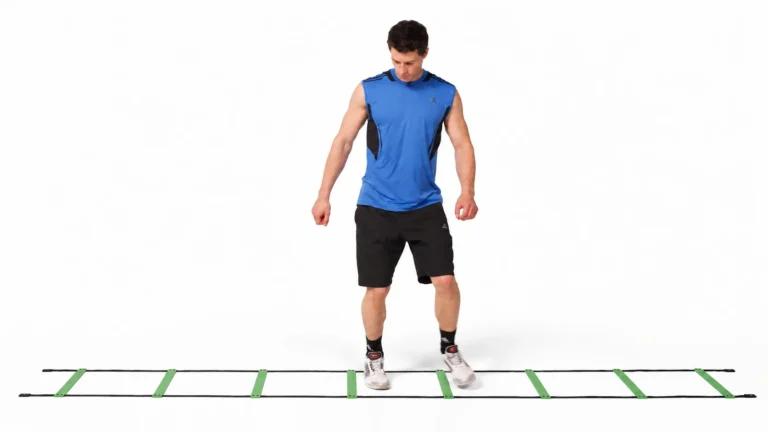
Arrange three cones in a semicircle, one to two feet in front of the athlete. Begin on the left leg with slight hip and knee flexion. Keep the trunk controlled and the free right knee extended. Direct that free heel toward the centre, left and right targets. The heel points toward the target; it does not become a second supporting foot. Recover the support position before changing direction. Repeat on the right leg with the left heel reaching. The photograph is one position reference, not the complete three-direction sequence.
Watch The Original Movement Reference
Watch the original directional movement reference. The clip reaches centre, right, then left, and its pauses vary in duration. The written book sequence for levels one and two is centre, left, then right. This footage shows one supporting leg. It does not demonstrate a complete five-second-hold protocol or an unpredictable calling sequence. Use it to see how the same free heel changes direction while the supporting foot remains the base. Then apply the timing, order and second-side practice required by the selected level.
Level I: Establish The Five-Second Hold
For level one, direct the free heel toward the centre cone and establish control. Only then start the five-second count. Recover the supporting position, reach left and hold again, then recover and reach right. Keep weight on the supporting foot throughout each hold and breathe normally. A photograph held on screen is only a position reference; it does not prove the athlete completed a timed hold. Observe the actual athlete for the entire interval. If a touchdown or supporting-foot step ends the position early, record that interruption rather than counting it as a completed hold.
Level II: Remove The Hold, Keep Recovery
Level two uses the same target arrangement and centre, left, right order without the prescribed five-second holds. Remove the hold, but keep a controlled reach and a deliberate recovery before the next target. Sweeping the leg rapidly across all three cones changes that task. Watch whether the supporting foot steps or the reaching foot starts to take weight. Complete the sequence on each supporting leg. If changing direction causes a loss of control, shorten the reach or bring the cones closer. Keep the chosen distance consistent when comparing the two sides.
Level III: React To The Called Target
For level three, number the cones one on the left, two in the centre and three on the right. A coach or partner calls a number in an unpredictable order. Direct the free heel toward that target, recover control and respond to the next call. Repeating a memorised number sequence does not provide the same uncertainty. The photograph identifies the support position; reactive calls are not demonstrated by the original clip. Increase call frequency only while the athlete can finish each reach and recovery without stepping or transferring weight onto the reaching foot. Change the supporting leg for the next set.
Change One Demand And Record It
Compare attempts using the same target distances and the same selected protocol. Record the supporting leg, reach arrangement, hold duration or calling conditions, and any modification. If the athlete loses control, bring the cones closer, shorten the reach or reduce the hold, and note the change. A shorter hold is a modified version rather than completion of the five-second task. For reactive work, allow more recovery time between calls when needed. These observations support coaching decisions; this exercise is not a diagnosis or a validated return-to-play score. Check tennis movement and decision-making separately on court.
Original photography and footage: Philipp Halfmann. White-background position photograph and synthetic narration. Original video retains the filmed studio background. The clip shows centre–right–left with variable pauses on one supporting leg. It does not demonstrate the complete timed or reactive protocols.
Three-Way Heel Reaches: Exercise Family 7.17–7.19 · Previous Lesson: Overhead Medicine-Ball Throw